Monday, 21 October 2013

Post Production


Construction and Editing-preliminary task

In this stage we started to compose our film by linking the footage which collected in the production satge. We did this using Final cut pro on the macs. We had to ensure that we maintained good match on action throughout it. The first piece of this sequence had fantastic match on action which we were really pleased with, however as we were adding in the rest of the footage we realised that we had parts of the footage we needed missing. This therefore meant that we had to go out and re-shoot parts of it. When Mr Lucas told us that our preliminary task had to include shot, reverse shot, we noticed that our planned scenario didn't contain this and that we werent sure how to include it in this scenario as the the two characters didnt talk to each other only to the head agent. After talking to Mr Lucas he said that it was our decision what we did next but suggested that we start again as we made our storyline unnecessarily difficult.


Thursday, 17 October 2013

Preliminary task- production

In the production stage we used the Canon camera to capture the shots that we had storyboarded. This was harder to complete than we expected, this was because what we could picture in our minds was hard to produce through the lens. During this stage we decided to capture extra shots than we needed so that when it came to editing we had all the footage that we needed. To capture this footage we used a few camera accessories. These were the three lenses, the steady cam, the mic and the tripod. By using these accessories we were able to capture a good, steady image.


Monday, 14 October 2013

Preliminary task


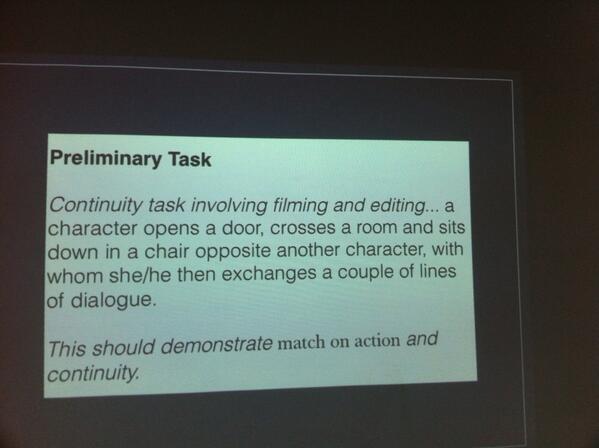
We were given the following task of which we had to construct it and film it in a group without guidance from the teacher. This was so that we could learn through the mistakes we made and build up our skills throughout the process.                        
Initially, I didn't have any ideas on how to create this scenario or where to start and so as a group we broke it down into parts. By doing this i imagined that we could film it in the action, or thriller genre.

Pre-production- work done on a product, especially a film or broadcast programme, before full-scale production begins.

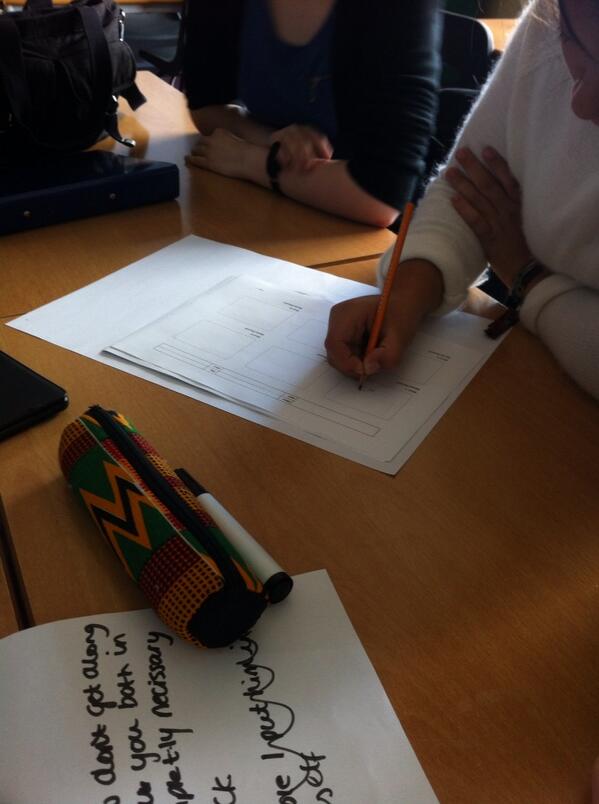
We decided to start creating this by following the film making process that we had created previously. We decided to come up with some ideas on the scenario we were given as to what genre,character types we wanted etc. from this we decided that we were going to make our film based on action (spy) genre. We started to storyboard our initial ideas by including shot types and character positions. We then scripted the scenario, this was mainly between the Head agent and one of the agents, as we chose to have one 'prim and proper' agent and another that was more casual and laidback.
Before we started filming we had to pic actors to play the parts of the characters. We decided to use ourselves in the film as this means that we don't have any worries about whether the other people can attend all of the filming sessions. However, as the head agent we decided to use Mrs Wilson as she fits the role of a mature, intelligent  person of which we needed for the 'top dog'.


We decided to film in the class room as it had a projectable screen which we could put Mrs Wilson's face on.


Sunday, 13 October 2013

Mise-en-scene and it's importance

Initially i knew that mise-en-scene was pretty much everything that is in the scene. However this is a generalised understanding of the term. I never expected that it would include so many different aspects of filming. These are lighting, costume, make up, appearance, props, background images, locations, set design, studio and colour.

The definition for Mise-en-scene is the arrangement of scenery and props to represent the place where a movie or play is enacted. To show our understanding of the key term we asked to create a scene which we were giving using props and the lights.


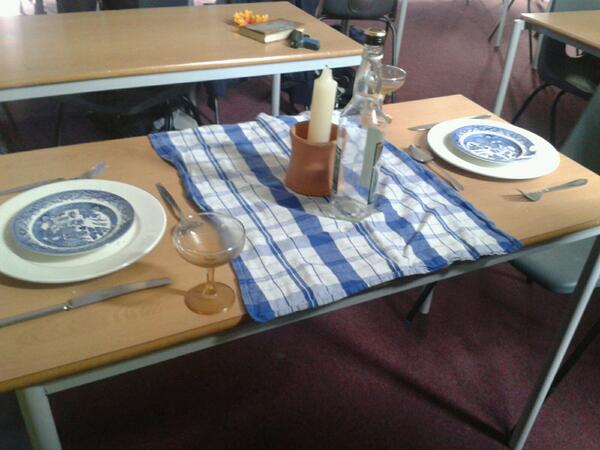
Embedded image permalinkThe first scene we created was of a romantic dinner. This is a romantic scene because there is a table with two place settings. The scene is candle lit with two glasses to show that the people were sharing a bottle of drink. It could be in a high class restaurant or in an agritourismo rustic restaurant. The props used in this scene are important so that the audience can see the setting and who would potentially be there, for example if there was only one place setting and no candle that would represent somebody eating on their own.


Embedded image permalink
This is a crime scene. We decided to make this an office setting which could be at home, so that it would seem isolated. We did this by using a type writer and some books as these would be typical objects found in an office environment. There is a gun underneath the corner of the book so that you can see elements of a crime drama but as you can only see part of the gun it makes it more mysterious. The candle suggests that the room may be poorly lit or that they wanted to feel more relaxed.


Mise-en-scene is important in any type of media, especially film as it sets the scene and genre. It may also create suspense or makes the audience empathise with the characters. Mise-en-scene also allows the viewer to follow the narrative so that the storyline has good continuity.

Shot, reverse shot


Shot, reverse shot is the process of switching the camera from facing one person to facing the other opposite which is behind the camera. This is usually used during dialogue scenes.

This can be done by filming the whole script three times. Once for the master shot, and the other two focused on the characters individually. These shots would then be cut-in to produce shot, reverse shot.

Cut-in is when a shot is inserted and cut in to a master shot.

The task: We began the task by watching the opening scene of Pulp Fiction. We were then instructed to recreate this scene, with the script which we were given, some blank storyboards and the camera equipment.

This is the original Pulp fiction clip:


We used shot, reverse shot in our recreation of Pulp Fiction, between the characters in the diner. This is our recreation of the scene from Pulp Fiction-  .


The aim of the clip was to include shot, reverse shot. In the clip we created this well between the two characters as we maintained the camera focus on each of the characters equally. Therefore the other mistakes in this clip weren't to be worried about at the moment.

We then went on and used shot, reverse shot in our preliminary task when the two characters were exchanging dialogue. We completed this well in our preliminary task. Here it is:-

 
As you can see, by including shot, reverse shot we can see the characters reactions to what the other one is saying which allows us to be ale to follow the narrative. Also shot, reverse shot enables us to understand that this is a conversation between two people.


Match on action


In class we learnt about match on action, this was so that we had the basic skills when it came to our final piece, to make it have good continuity and so that it would follow the narrative we were trying to put across.

Match on action is the idea of sequencing events in chronological order to maintain continuity so the narrative can be followed. This is by matching the movement from the footer of one scene with the header of the next.

We filmed a short sequence in which we tried to contain match on action. Link to be inserted here...

In my group i think that we achieved good match on action as the clip doesn't seem jarring at any points.

Sunday, 6 October 2013

Post on the use of technology during the filming process.


Technology

In the preliminary task we used technology in nearly every part of the filming process, whether it was in pre-production, production or post-production and this has helped me to develop my skills in many aspects of technology.

The first piece we used was the I-pads, experimenting with the camera on it to get our practise shots. This allowed us to get our visions and turn them into real life through the use of the camera. By doing this we could view what worked and what didn’t. This was a piece of technology that I previously knew how to use, however it allowed me to develop my skills.

We then put our practise shots into motion on the I-pad through the use of I-movie. By using this piece of software we could link the shots together to see if it was possible to follow the narrative and that there were no continuity mistakes. I didn’t know that this piece of software existed and so to be able to use this helped me to develop my editing skills in practise for editing our final shots. I-movie also enabled us to use basic transitions, add in music and non-diegetic sounds.

Next we used the camera kit to shoot our story board properly. This was harder than I expected. In order to produce the shots needed we had to use a combination of different camera shots and angles. During this stage I learnt how to use the camera properly and how the use of different lenses and shots can create effect and meaning in our piece of work. By having a wide range of equipment during this allowed me to come to terms with what is to be used when it comes to our final piece. We got to experience using the steady cam, tri-pod, mic, camera and the range of lenses.
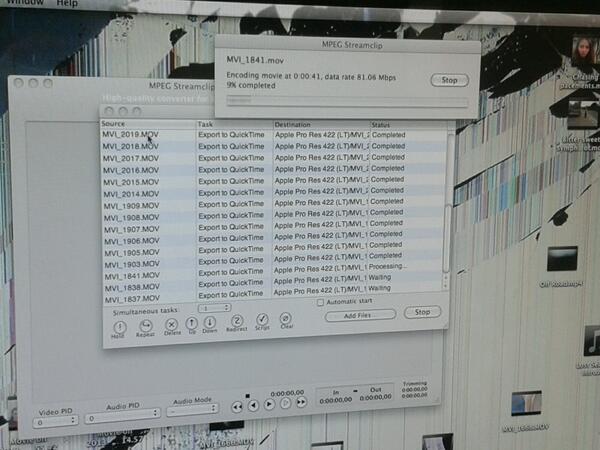
Embedded image permalink Then we had to encode our clips using MPEG Streamclip. We did this on the Apple Mac, and it took ages, but by doing this we could then progress onto the final stage before editing.

After this we had to export our video to final cut pro, this was relatively simple once we knew what to do. We then progressed onto the next stage which was editing our films and sequencing it in. There are so many ways in which we can do this, however during this progress we realised that we needed to re-do some shots and therefore we have started filming again. Before we did this, I didn’t realise that there were so many ways in which we could edit the film and this meant that I was able to develop both my knowledge and skills, so that during the final piece I know exactly how to use the software. I keep picking up tricks and new tips on how to improve our film clip which is really helping me to develop my skills in filming.

During the filming process we used two items of Apple technology. These were the I-pads and macs. I was impressed with the quality of these pieces of equipment and how they allowed us to improve and edit our footage. I was not a frequent user of these beforehand and so learnt new skills and broadened my knowledge on them.