Monday, 16 December 2013

Analysis of film openings

Love Actually (2003)

This romantic comedy is directed by Richard Curtis. It follows the lives of eight very different couples in dealing with their love lives, and is set during a frantic month before Christmas in London, England. The separate story lines all intertwine at some point or other.

The first 1:19 minutes sets the genre of the film without revealing the storyline at all. There is a sequence of montage shots, which focus on different people expressing their love for another in someway.  At 25 seconds the voice over begins which gives an outline if their views on love. We are made to believe that this character could potentially be the protagonist.
The background music has no words to it and has an airy, heavenly vibe to it which represent peace, hope and happiness. We can come to this conclusion due to it being played in a major key.

At 1:19 the title of the film appears, reading ' love actually' which is then joined by 'is all around us'. Some of the words are written in red which has connotations of love and passion and therefore this sticks tot he conventions of the romance genre.

Below is the opening sequence for love actually:

Wednesday, 11 December 2013

Inglorious Basterds

In class we analysed the film opening for Inglorious Basterds. This is an action film with an element of black comedy. It was made as a parody for WW2 movies made in the 50's. Inglorious Basterds was directed by Quentin Tarantino and was released in 2007.

 
This is a storyline plan for the opening of this film. On here I have written down when the different titles came on screen, actors, and the rest of the visuals. When context was introduced, parts that created enigma and anything to do with sound or soundtracks.
 
Here is a rough break down of the opening:
 
  • In the opening of this film it begins with an old version of the Universal logo. The old version may have been used to create context and give us an insight to the time period it was set in and that it is based on a historical event. This lasts from 3-12 seconds and is placed on a black screen with no sound.
  • The Weinstein logo then appeared from 12-20 seconds and has the same features.
  • The soundtrack then begins to play at 20s and is a traditional piece of music for that time period and therefore it set the context.
  • At 24s the production company titles begin and last for 12s
  • At 36s the directors name appears
  • At 40s the film title appears which is in a different type face and colour which informs us that this is the film
  • The names of the actor then appear in the order that they appear most- starting with Brad Pitt. There are 8 starring actors followed by co-starring actors and then guest starring. Lasts for 1 minute.
  • At 1:48 the soundtrack is still playing and the titles for chapters appear- forms context. 'Nazi occupied France' at 1:53 and '1941' at 2:03
  • At 2 minutes the soundtrack fades and then stops.
  • At 2:03 the characters are introduced through a wide shot of a man- this also sets the scene.
  • A chopping sound is then heard
  • The woman character comes into shot at 2:14
  • At 2:17 the sound of an unseen vehicle comes in which creates enigma
We stopped watching the clip at this point.
 
In this opening I liked the way that they introduced context from the very beginning in the Universal logo and continued it to the point that we stopped watching.
 
  • 

Wednesday, 20 November 2013

Editing...

Cinematic/ Real time, Expanding time and Shrinking time

Cinematic time/Real time: whether what is happening on the screen takes the same time as it would in real life, this can be completed through editing. In film time can be compressed or expressed.

Expanding time: This is when the event that is happening on the screen takes longer than it would in real life. This can be done by including less cuts, slow motion and including extra relevant shots. This is usually used in horror or thriller films.

Shrinking time: This is when what is occurring on the screen happens quicker than it would in real life. This can be achieved by including more cuts and by speeding up time. This is usually used in action films.

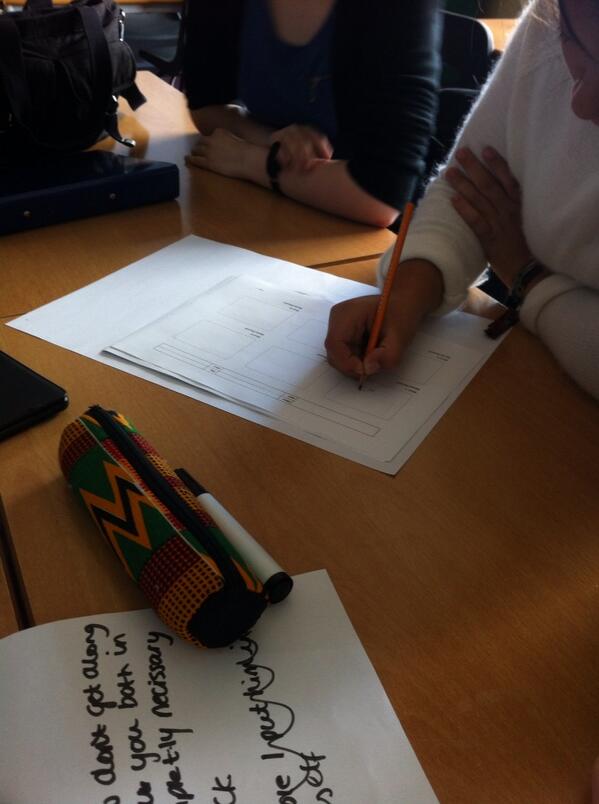
The first thing we had to do was to watch two clips, one from Slumdog millionaire and the other from The Bourne Ultimatum and write down some notes about how they made us feel. I felt as though the Slumdog millionaire clip made me feel sad and empathise for the characters however there was also a sense of urgency and even hope towards the end. In The Bourne Ultimatum clip there was an obvious sense of urgency, it was also intense and made me feel on the edge. Below is the notes I made in class:

 
Here is part of The Bourne Ultimatum clip that we watched:


Here is part of the Slumdog millionaire clip that we watched: (Watch from 16:10 - 21:50)


We then were split into two groups and given some questions which we had to answer on one of the clip each. My group  was given the Slumdog Millionaire clip. The two questions that I answered were:
 
 
The first question I chose to answer was 'Are there any examples of expanding time? How does this contribute to mood?'.
 
In the clip there were examples of expanding time. An example of this is when the camera sequence cuts from the boys in the water, to the woman washing clothes, back to the boys and then to the mother. By including these extra shots, time has been expanded to show not only the normality of the day but the setting and characters as well.
 
Another example of expanding time in the clip is when the boys see the god, the shot has been put into slow motion. This is to show the importance of the god. Firstly as the god is from the opposing religion and also for the relevance of the question on the quiz show.
 
The second question I had to answer was: 'How does he narrative create mood?'.
 
The narrative creates mood as it is telling us exactly what is going on in the storyline, therefore we are enabled to feel empathy for the characters through our understanding of what is happening.
 
 
                                                                            ***
 
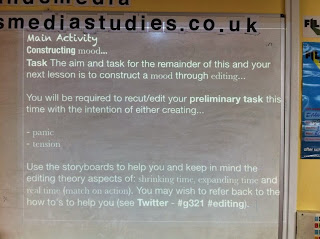
Next we had to use either expanding or shrinking time in our preliminary task to create a given mood. We were given panic!
  • Our initial ideas were to include more cuts in the sequence as this would make it jumpy and feel as though time was going faster as you wouldn't see everything the characters were doing.
  • We also decided to speed up the pace of the characters' feet walking so that it look as though they were in a hurry for what they were doing.
  • Another thing we did to shrink time was to not include all of the dialogue between the two characters as this would make the audience feel more relaxed and be ale to follow the storyline perfectly. We decided to leave out some of the dialogue to also create a mysterious side to the storyline as the audience wouldn't know exactly what was occurring between the two characters.
  • We also created a black out half way through the clip, when you can hear the sounds but not see anything which makes it more panicky.
  • Towards he end when we watched the clip back we felt as though it still wasn't creating the right mood even though we had included all of these shrinking time techniques. Mr Lucas hinted that a soundtrack may help to create mood. We went online and found a tense, and fast paced piece of music that we could use.
Here is the clip that we edited to create the mood of panic!:


Thursday, 7 November 2013

Sound

In class we learnt about the different types of sound in television programmes/film and why it is used in media. Sound is important in films and television as it sets the mood for the audience and allows them to understand what they are watching. Music/ sound during film/TV may also allow us to follow the narrative and whether I is leading into something positive or negative.

We started the lesson off by listening to 5 different theme tunes from film/TV. We then had to work out what programme or film it was, how it made us feel and what type of programme we were expecting to watch.

The first piece we listened to was from 'The Fresh Prince of Bel Air'. I watch this programme quite a lot and so I was familiar with it's theme music. The theme music made me feel happy/ it put me in a good mood, upbeat and ready to boogie! If I hadn't of watched this programme before I would expect it to be based in America and be about young back people. As you can tell I have pretty much described the programme itself, therefore this is a good representation of the programme and incites us as to what it is about.

Here is the theme music for 'The Fresh Prince of Bel Air'-


The next theme music we listened to was from the film 'The A-team'. When this was being played I was unsure of the music as I had only watched this filmed once before, this meant that there was no chance of me writing down what I knew. This piece of music made me feel intrigued, happy and excited. I was unsure of the type of film that it came from and thought that it might be from a superhero movie or one about the army as there was a deep drums playing in the background. However I knew that it was from an action movie from the pace of it and the instruments used.
Here is the theme music from 'The A-team'-


The third one we listened to was from 'Dr Who'. This made me feel sleepy, intrigued and sort of unsure as to whether I liked it or not. The synthesised sound made me realise that it was sci-fi , and was to do with aliens of some form.

Below is the theme music for the 1963 Dr Who:
 
The next theme tune we listened to was from the well-known soap opera 'EastEnders'. This is a programme that I watch everyday and so I knew what it was represented. This music made me feel relaxed, happy and even tense. This was well suited to the genre as it was dramatic and therefore I was expecting to watch a soap opera.
 
The Theme music for EastEnders is:
 
The final piece we listened to was from 'Hollyoaks'. The theme music for this made me feel happy but also slightly annoyed me.  The instruments in the music and the fact that it was the same part repeated throughout it made me think that it was going to be another soap opera. However the instruments used and the key in which is was played made me suspect that it would be mainly focused on young people.
 
Here is the theme music for 'Hollyoaks'-


We then learnt about the key terminology to do with sound. Below is the work that I did for this. In orange are the diegetic sounds and in green are the non diegetic sounds. This will be useful to use in my final piece.


Friday, 25 October 2013

Shot aspects


There are four shot aspects that we have learnt about. These are composition, framing, depth and focus.
 
Framing is what the director chooses to be shown in shot and what they choose to exclude from it.
 
Composition is way that the shots constituents/the way in which it is made up.
  • The rule of thirds is a guideline which applies to the process of composing visual images. The guideline proposes that an image should be imagined as divided into nine equal parts and that important compositional elements should be placed along the separating lines or their intersections.

Depth is the space between the character/ object at the front and the back of the shot.

Focus is whether an image is sharp or soft. This allows the audience to see what they are expected to look at and what they aren't.

Once we had learnt about the four shot aspects, we did a practical lesson containing what we had learnt. The task we were set was to take the 4 still images from famous films that we were given and recreate them capturing the same depth, focus, composition and framing.


The first was a still from 'Indiana Jones- raiders of the lost ark'. As well as trying to capture the shot aspects, we also used mise-en-scene to create the same context of the image. Here is our recreation of this still image.
 
As you can see the focus of our still is pretty much perfect compared with the original, however there isn't as much depth between our Indiana and the idol. As well as this we could have brought the camera forwards so that we didn't capture as much of the background so that it was the same as in the original.
 
 
The next image we recreated was from 'Shaw shank redemption'. Below is the original still that we were to recreate.
 
As you can see the still is captured from a high angle, almost a birds eye view shot. It contains a lot of depth between the subject and background.
 
 
In our recreation of this still we didn't capture the subject at the right angle and so the depth that we needed to create we didn't. However again like before we have captured the focus on the subject like in 'Shaw shank redemption'. The framing is as close as we could get it. We chose to exclude only the subject and the ground as in 'Shaw shank redemption' it is capturing only this as he is expressing his freedom.
 
The third still we had to recreate was from 'Pulp Fiction' when the two men are in the elevator.
 
 
The depth between the two men and the back wall is large. Here is our recreation of this still:
 
 
The depth in this image between the subject and the background isn't deep enough and so it does not create the same effect and therefore makes it feel more 2D and unreal. The framing is well done along with the focus. The framing is well done as we have included the two shot and just the background with no other objects or mise-en-scene.
 
The final shot we recreated is my favourite and comes from 'Taxi driver'.
 
 
The camera is focused sharp on the man and soft on the gun. We did this by twisting the lens until it was sharp or soft on the part of the still that we wanted. There is not much in this still and so it was easy to recreate when it came to framing.


We managed to make the gun soft and the focus is sharp on the subjects face. In the framing we decided to include only the person and the gun as we couldn't find a setting that was similar.

I found this process useful and fun to complete. It was useful as we were putting what we had learnt into practise and so learning through any mistakes that we may make and if not, through what we did well. It also allowed me to get some more experience when using the camera.

Shot types

The type of shot used can have a profound effect upon the audience.

The following are the types of shots that we learnt about in class:

Wide:
This shot is taken from a long distance and aims to capture both surroundings and action. It is often used as an establishing shot at the start of a film but also be used to show loneliness/isolation. Here is an example from 'Cowboys and Aliens' of a wide shot.


Long:
This shot is taken from a long distance capturing the whole setting or character. It is used to show the relation between the character and the setting. This is an example of a long shot from the film 'from the front row'.


Mid:
A mid shot is taken closer in than a long shot, only capturing half a character or setting. This is to focus on the image in frame and is related to the narrative. Below is an example from '17 again'.


Medium close-up
A medium close up shot captures a quarter of a person or setting. This is so the audience focuses on a certain aspect of what is in shot. An example of a film this is used in is 'Indiana Jones- raiders of the lost ark'.


Close Up
A close up shot is taken to capture just the head of a character. This let the audience see the characters emotion and empathise with them. Here is an example from 'Thor'.


Extreme Close Up
An extreme close up is of just the eyes and top of head, or of an equivalent body part. This build suspense as it shows the extreme emotions of a character. Here is an example from 'The grey'.


Over the shoulder
An over the shoulder shot is taken to capture one person over another's shoulder usually used during dialogue or to watch one persons reaction. Here is an example from 'The hangover'.
 
 
Point of view
This is a shot from a persons point of view, so what that person sees. This is used so that the audience feels/sees something from the characters perspective and so can empathise with them.
 
 
Two shot
This is a shot taken to capture two people in the frame together. This allows the audience to see both the people in the same room at the same time.
 
Weather

A shot taken to capture the weather outside to set atmosphere and mood.
 
 
By using a range of these shots in a film the audience can relate to it and it can build a range of emotions. It also helps to make the narrative easier to follow. These have an large affect on the audience.
 
We used some of these shots in all of the practical work that we have done so far. For example in our 'Pulp Fiction' recreation we used an over the shoulder shot and a couple of mid shots.


Wednesday, 23 October 2013

Starting again...

'Back to the drawing board'

We decided to restart our preliminary task from the beginning and use this as a learning curve. Starting the process again we began with storyboarding. The sequence we chose was simple so that we could manage to do it all in time for the deadline, but still included all the essential skills- match on action, shot reverse shot.

Scripting and the shot list was easier to complete this time as we had previously filled one in and so knew what we were doing. This meant that we could get it done in half of the time.

That afternoon we went out and got all the footage that we needed plus more so that we knew we would definitely have enough to make the film work and include the essential ingredients. We decided to film in the sixth form block as the table set up and room structure was perfect for what we were trying to create.

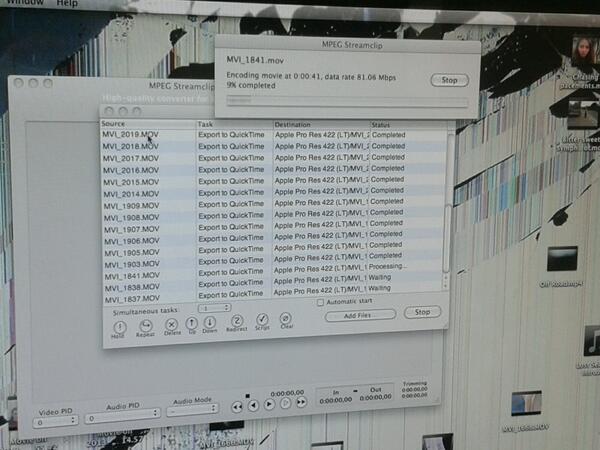
Embedded image permalinkWe then went back to the media suite to encode our clips using MPEG Streamclip so that we could then get on with putting the clips together and edit it.

We were able to slot the clips together using Final cut pro and cut in parts of clips to create the shot, reverse shot. To create the match on action we just had to make sure that when we cut to another clip that everything in the frame was the same as in the last shot.

After we had finished putting the preliminary task together we created some rolling credits saying which of us did what parts in the film making process. We worked out how to do this using trial and error, which helped us to remember how to do it in future.

Below is our final preliminary task:


I enjoyed completing this preliminary task as it allowed me to work things out on my own, which will help me to remember them and not make the same mistakes in the final piece. It also helped me work on time management and see how much time i would need to input. I am pleased with the preliminary task as it includes the key skills that we needed.

Monday, 21 October 2013

Post Production


Construction and Editing-preliminary task

In this stage we started to compose our film by linking the footage which collected in the production satge. We did this using Final cut pro on the macs. We had to ensure that we maintained good match on action throughout it. The first piece of this sequence had fantastic match on action which we were really pleased with, however as we were adding in the rest of the footage we realised that we had parts of the footage we needed missing. This therefore meant that we had to go out and re-shoot parts of it. When Mr Lucas told us that our preliminary task had to include shot, reverse shot, we noticed that our planned scenario didn't contain this and that we werent sure how to include it in this scenario as the the two characters didnt talk to each other only to the head agent. After talking to Mr Lucas he said that it was our decision what we did next but suggested that we start again as we made our storyline unnecessarily difficult.


Thursday, 17 October 2013

Preliminary task- production

In the production stage we used the Canon camera to capture the shots that we had storyboarded. This was harder to complete than we expected, this was because what we could picture in our minds was hard to produce through the lens. During this stage we decided to capture extra shots than we needed so that when it came to editing we had all the footage that we needed. To capture this footage we used a few camera accessories. These were the three lenses, the steady cam, the mic and the tripod. By using these accessories we were able to capture a good, steady image.


Monday, 14 October 2013

Preliminary task


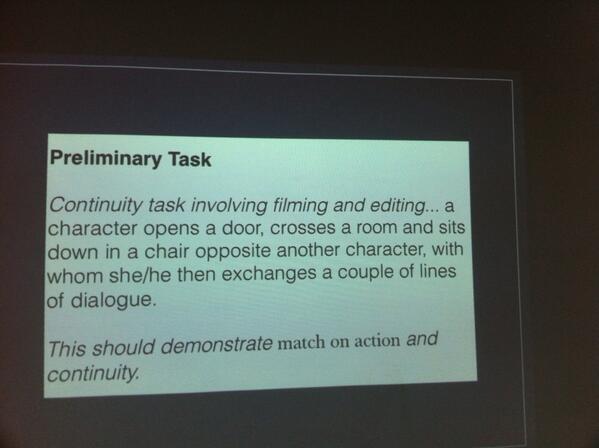
We were given the following task of which we had to construct it and film it in a group without guidance from the teacher. This was so that we could learn through the mistakes we made and build up our skills throughout the process.                        
Initially, I didn't have any ideas on how to create this scenario or where to start and so as a group we broke it down into parts. By doing this i imagined that we could film it in the action, or thriller genre.

Pre-production- work done on a product, especially a film or broadcast programme, before full-scale production begins.

We decided to start creating this by following the film making process that we had created previously. We decided to come up with some ideas on the scenario we were given as to what genre,character types we wanted etc. from this we decided that we were going to make our film based on action (spy) genre. We started to storyboard our initial ideas by including shot types and character positions. We then scripted the scenario, this was mainly between the Head agent and one of the agents, as we chose to have one 'prim and proper' agent and another that was more casual and laidback.
Before we started filming we had to pic actors to play the parts of the characters. We decided to use ourselves in the film as this means that we don't have any worries about whether the other people can attend all of the filming sessions. However, as the head agent we decided to use Mrs Wilson as she fits the role of a mature, intelligent  person of which we needed for the 'top dog'.


We decided to film in the class room as it had a projectable screen which we could put Mrs Wilson's face on.


Sunday, 13 October 2013

Mise-en-scene and it's importance

Initially i knew that mise-en-scene was pretty much everything that is in the scene. However this is a generalised understanding of the term. I never expected that it would include so many different aspects of filming. These are lighting, costume, make up, appearance, props, background images, locations, set design, studio and colour.

The definition for Mise-en-scene is the arrangement of scenery and props to represent the place where a movie or play is enacted. To show our understanding of the key term we asked to create a scene which we were giving using props and the lights.


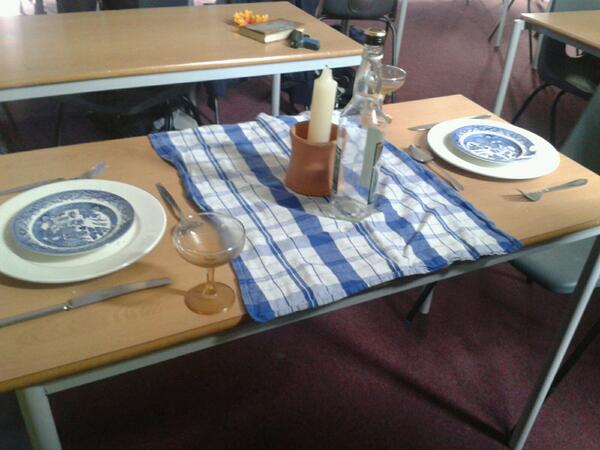
Embedded image permalinkThe first scene we created was of a romantic dinner. This is a romantic scene because there is a table with two place settings. The scene is candle lit with two glasses to show that the people were sharing a bottle of drink. It could be in a high class restaurant or in an agritourismo rustic restaurant. The props used in this scene are important so that the audience can see the setting and who would potentially be there, for example if there was only one place setting and no candle that would represent somebody eating on their own.


Embedded image permalink
This is a crime scene. We decided to make this an office setting which could be at home, so that it would seem isolated. We did this by using a type writer and some books as these would be typical objects found in an office environment. There is a gun underneath the corner of the book so that you can see elements of a crime drama but as you can only see part of the gun it makes it more mysterious. The candle suggests that the room may be poorly lit or that they wanted to feel more relaxed.


Mise-en-scene is important in any type of media, especially film as it sets the scene and genre. It may also create suspense or makes the audience empathise with the characters. Mise-en-scene also allows the viewer to follow the narrative so that the storyline has good continuity.

Shot, reverse shot


Shot, reverse shot is the process of switching the camera from facing one person to facing the other opposite which is behind the camera. This is usually used during dialogue scenes.

This can be done by filming the whole script three times. Once for the master shot, and the other two focused on the characters individually. These shots would then be cut-in to produce shot, reverse shot.

Cut-in is when a shot is inserted and cut in to a master shot.

The task: We began the task by watching the opening scene of Pulp Fiction. We were then instructed to recreate this scene, with the script which we were given, some blank storyboards and the camera equipment.

This is the original Pulp fiction clip:


We used shot, reverse shot in our recreation of Pulp Fiction, between the characters in the diner. This is our recreation of the scene from Pulp Fiction-  .


The aim of the clip was to include shot, reverse shot. In the clip we created this well between the two characters as we maintained the camera focus on each of the characters equally. Therefore the other mistakes in this clip weren't to be worried about at the moment.

We then went on and used shot, reverse shot in our preliminary task when the two characters were exchanging dialogue. We completed this well in our preliminary task. Here it is:-

 
As you can see, by including shot, reverse shot we can see the characters reactions to what the other one is saying which allows us to be ale to follow the narrative. Also shot, reverse shot enables us to understand that this is a conversation between two people.


Match on action


In class we learnt about match on action, this was so that we had the basic skills when it came to our final piece, to make it have good continuity and so that it would follow the narrative we were trying to put across.

Match on action is the idea of sequencing events in chronological order to maintain continuity so the narrative can be followed. This is by matching the movement from the footer of one scene with the header of the next.

We filmed a short sequence in which we tried to contain match on action. Link to be inserted here...

In my group i think that we achieved good match on action as the clip doesn't seem jarring at any points.

Sunday, 6 October 2013

Post on the use of technology during the filming process.


Technology

In the preliminary task we used technology in nearly every part of the filming process, whether it was in pre-production, production or post-production and this has helped me to develop my skills in many aspects of technology.

The first piece we used was the I-pads, experimenting with the camera on it to get our practise shots. This allowed us to get our visions and turn them into real life through the use of the camera. By doing this we could view what worked and what didn’t. This was a piece of technology that I previously knew how to use, however it allowed me to develop my skills.

We then put our practise shots into motion on the I-pad through the use of I-movie. By using this piece of software we could link the shots together to see if it was possible to follow the narrative and that there were no continuity mistakes. I didn’t know that this piece of software existed and so to be able to use this helped me to develop my editing skills in practise for editing our final shots. I-movie also enabled us to use basic transitions, add in music and non-diegetic sounds.

Next we used the camera kit to shoot our story board properly. This was harder than I expected. In order to produce the shots needed we had to use a combination of different camera shots and angles. During this stage I learnt how to use the camera properly and how the use of different lenses and shots can create effect and meaning in our piece of work. By having a wide range of equipment during this allowed me to come to terms with what is to be used when it comes to our final piece. We got to experience using the steady cam, tri-pod, mic, camera and the range of lenses.
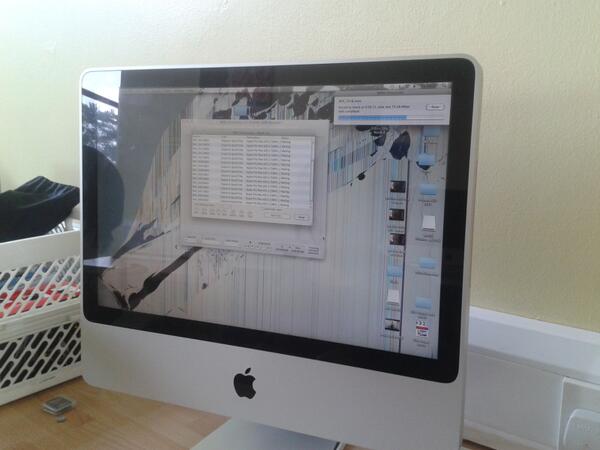
Embedded image permalink Then we had to encode our clips using MPEG Streamclip. We did this on the Apple Mac, and it took ages, but by doing this we could then progress onto the final stage before editing.

After this we had to export our video to final cut pro, this was relatively simple once we knew what to do. We then progressed onto the next stage which was editing our films and sequencing it in. There are so many ways in which we can do this, however during this progress we realised that we needed to re-do some shots and therefore we have started filming again. Before we did this, I didn’t realise that there were so many ways in which we could edit the film and this meant that I was able to develop both my knowledge and skills, so that during the final piece I know exactly how to use the software. I keep picking up tricks and new tips on how to improve our film clip which is really helping me to develop my skills in filming.

During the filming process we used two items of Apple technology. These were the I-pads and macs. I was impressed with the quality of these pieces of equipment and how they allowed us to improve and edit our footage. I was not a frequent user of these beforehand and so learnt new skills and broadened my knowledge on them.
 

Wednesday, 18 September 2013

Creativity blog post.


Initially the word creativity was one that I used too freely. However when we discussed it in class I began to rethink my previous thoughts. I always used the word creative when seeing a piece of unique artwork that I liked. What I didn’t realise is that this is just the beginning of its true meaning.

Before we moved on I came up with a definition of creativity, this was: Being able to create/ make something which is unique and appeals to someone else. Creativity can be inspired by anything.

 As a class we came up with the definition: An aim to explore expression and external influences (e.g. upbringing, surrounding environment and existing products) that don’t necessarily need to be original. To do with something you don’t see everyday that provokes a reaction and solves an existing problem. Creativity is making.

So let’s break it down, ‘An aim to explore expression and external influences (e.g. upbringing, surrounding environments and existing products)’. This is an important part of creativity as through creating something, whether it is a song, film or artwork, enables us to express our emotions through what we are doing and makes our resulting product meaningful and represents the way we feel. On the other hand we are also able to express our enthusiasm for what we are doing through creativity.


Mind mapping allowed us as a class to answer and discuss ideas about creativity.
 
1. One of the questions was: Is creativity a skill? Can it be developed?

I think that creativity can be developed as when a person finds new inspiration and influences they can build on what they have already achieved. Also a person may come up with new ideas to improve what they have already created. In my opinion creativity is a skill as it is possible to be developed and improved.

 
2. We were also asked, what is your inspiration?

Things that can inspire us are pretty much anything around us such as pieces of work other people have done, the people we mix with, ourselves, music, media and basically everything we are subjected too. We can also pick pieces of inspiration from other work and mix it into our own to make something different.

 
3. The third one was when are you most creative?

As a class we came up with some interesting ideas. These are when we have just woken up during the alpha stage, during our sleep in dreams when our imaginations have free rein, when we listen to different types of music, (especially instrumental/ classical that don’t have lyrics to disrupt our thought process). Also I think we could be most creative after a really busy (after school), when we have different thoughts flowing through our minds about what we have done during the day, as then we can throw all our thoughts and feelings into it to create a creative piece of work.

 
4. The last question was how can our creativity be developed?

We can develop our creativity by working on and improving what we have already done, we could also collaborate with other people so that you can have more ideas to improve/ develop your creativity. We can also develop our creativity by thinking outside the box so that you can create something unique. To develop it we may need to extend our knowledge on a subject so that we can use it for interpretation.


Shooting our short film- ‘PANIC!’

While making our first short film-‘PANIC!’ there were many decisions we had to make so that our film was suited to its title. https://www.youtube.com/watch?v=wL4gGCRm_ZQ

 
One of the first we made was where the short film was to be shot (the location) - we chose to shoot it on the stairs outside our classroom. This idea was influenced mainly by the fact that most action and thrillers shoot similar scenes on stairs as it creates tension. We also chose to do it on stairs as we knew we could keep running down the stairs which is suitable for the title as it makes the film fast-paced. The next choice we made was the camera shot type. We decided to do it from the victims’ point of view as this means the audience empathises with the character and therefore they can relate to the scenario better, this is also is an idea we have seen in existing films. The next important choice was mise-en-scene. As a team we decided to only have the shoes in the picture as it means that the characters are kept anonymous which builds tension and makes it mysterious. For the chaser/ villain we decided to use boots as they are bulkier which make the character seem ‘harder’ and stronger. They also made a louder sound. The only sound in the short film was fast-paced footsteps and heavy breathing as this emphasises the desperation the characters feel. This was also seen in existing films. Another decision we made was the pace at which the characters were moving. We decided to have them running as this builds tension and suspense which makes the short film more interesting. Fast-paced movement is often used in action films. The fact that we used no dialogue helps hide the characters identity and there personalities which builds tension as you don’t know why the character is panicking, however by the other decisions we made, means it is possible to work it out.


Reflection activity

On reflection I realise that what I previously thought about creativity was so small compared to its true meaning. Creativity is a vast idea which is hard to define unless made to think about it. Once we had completed the work we needed to on this topic I helped modify my understanding on creativity and therefore I am now able to develop it further. The making of the short film enabled us to put our ideas into action, which allowed us to use the idea of creativity to make the film the best it could be.

I think that the more you know about something makes you less creative as it restricts your interpretations on the subject as you would try to stick to the guidelines. For example if you were given a task and rules you had to follow, you may not experiment with ideas as much as you would if there were no rules.